This tutorial was originally hosted on my GitHub page, but I decided that GitHub probably isn't the best place to post tutorials, so I'm gonna repost it here instead.
(Note that I also changed various things from when I originally posted the tutorial just to keep things up to date.)
Have you ever seen these crazy manga screentone gradients and filters and wondered, "That's so cool! How can I do that??" Well, I'm gonna teach you how to yourself using an awesome drawing app for most mobile devices called ibisPaint X.
This tutorial assumes you know the basics of ibisPaint X (drawing, using layers, applying filters, etc). If you don't know how to, I recommend you touch base on that stuff before following this tutorial.
Other than that, let's get started!
So first, we need to create a blank canvas. The size doesn't really matter, but for my purposes, I set my canvas size to 2160 by 1620 pixels, since that's the resolution of my iPad.
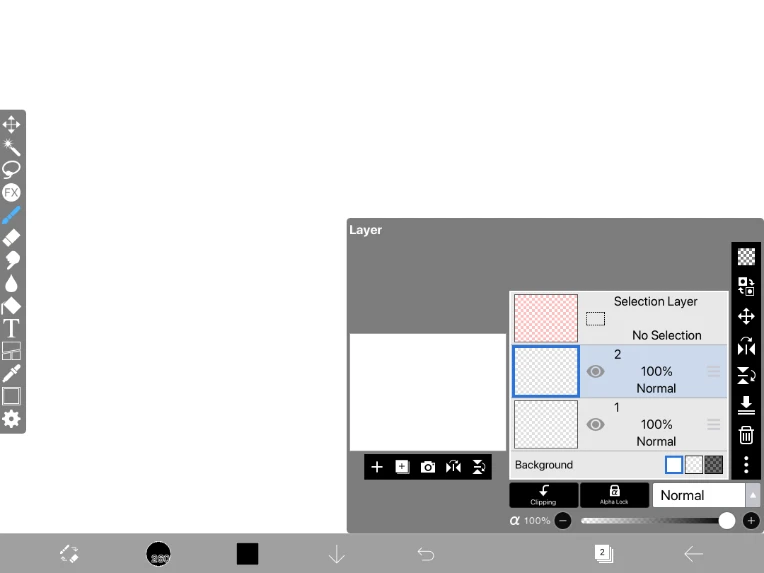
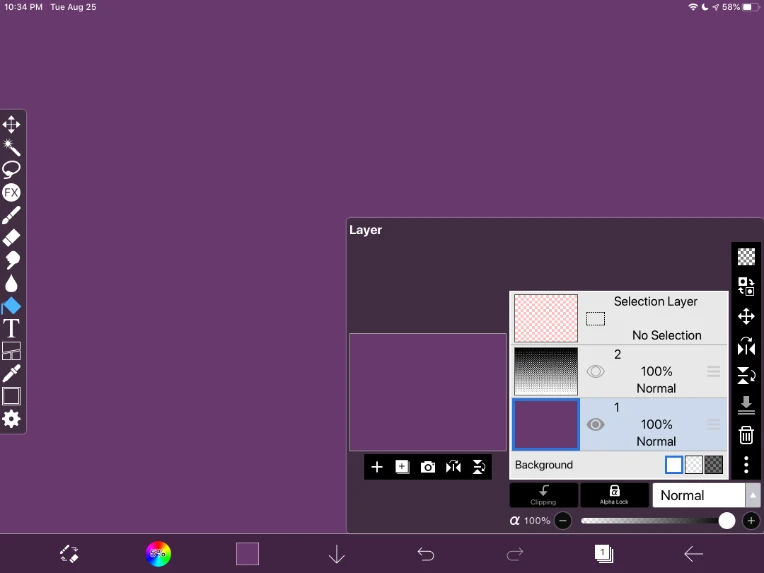
Also, you want to make sure your canvas has two layers, each on 100% opacity and with the blending mode set to Normal.

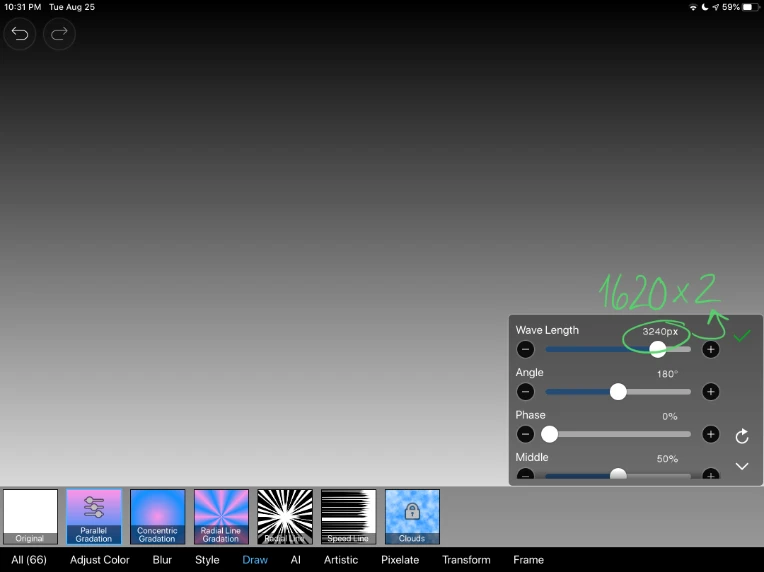
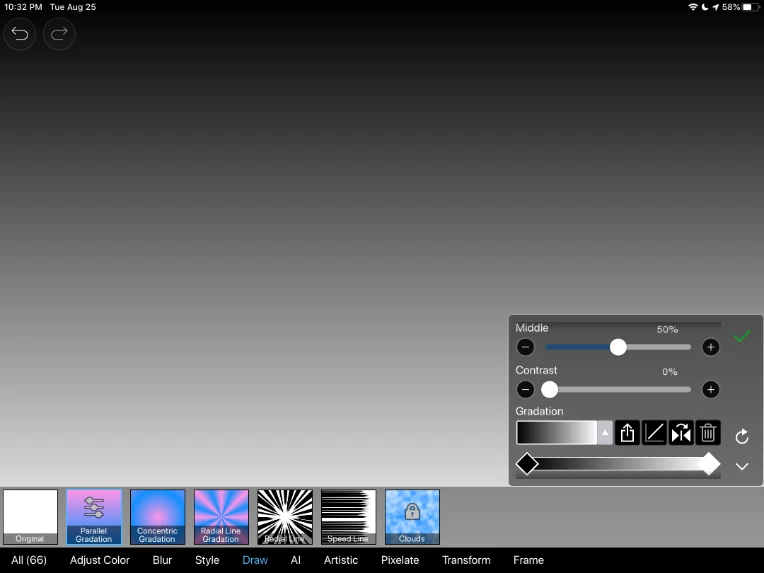
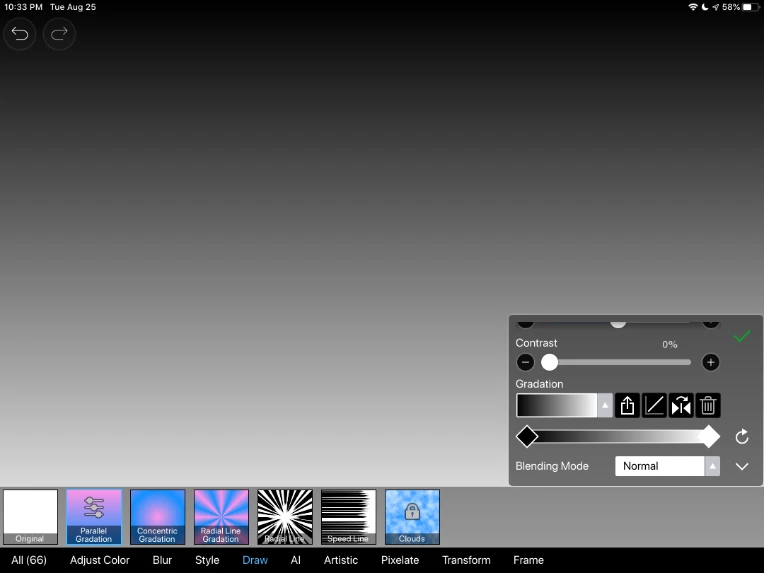
Make sure your top layer is selected and then go to the Effects tool and choose Draw > Parallel Gradation. For this trick to work properly, you must make sure your gradient is between solid back (0, 0, 0) and solid white (255, 255, 255). Also make sure Middle is set to 50% and Contrast is set to 0% (unless you insist on tweaking them to your liking). The other settings don't matter that much, but here's how I set them for reference:
- My wave length is set to 3240 pixels. Because I want my gradient to be a perfect top to bottom one, I must have my wave length exactly double my canvas height. So, 1620 * 2 is 3240.
- My angle is, of course, set to 180°, although you can also have it at 0° or 360° to get the same result.
- My phase is set to 0%.
- I set my blending mode to Normal, but you can pretty much set this to whatever you want, assuming your layer is blank to begin with.


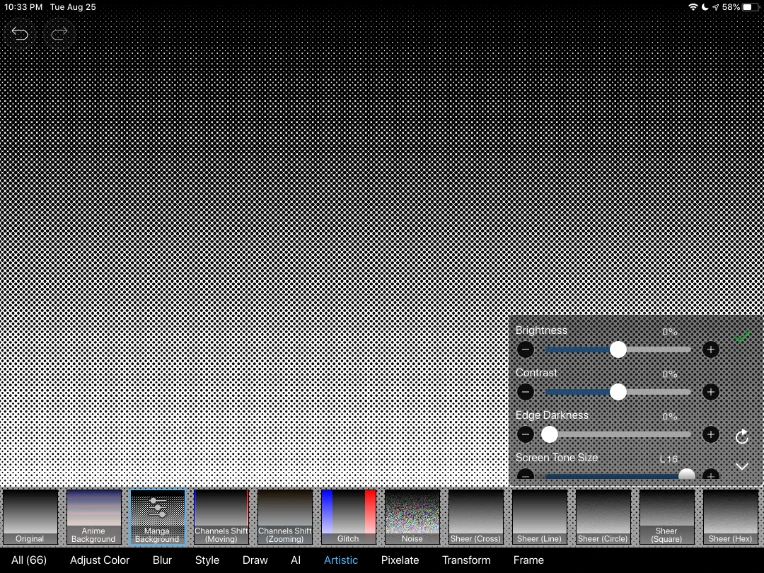
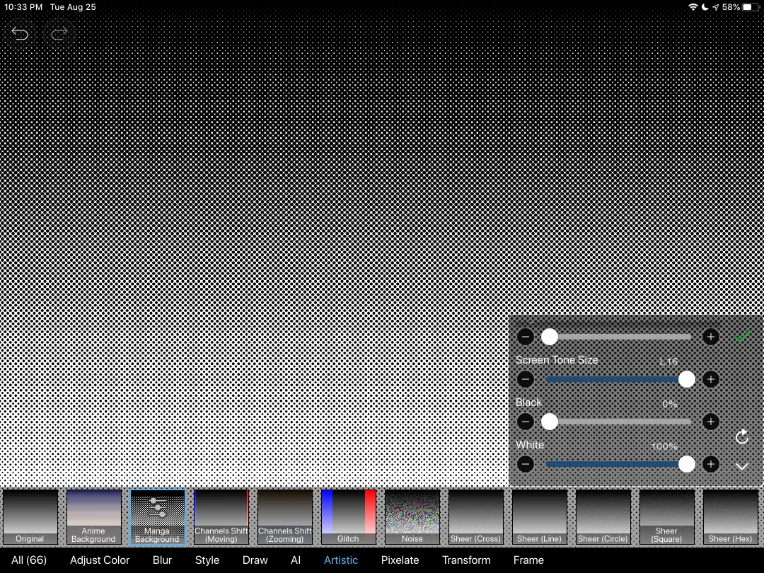
Now you can apply your changes. Next, still with your top layer selected, choose Artistic > Manga Background from the Effects menu. Make sure you set the following settings accordingly:
- Brightness: 0%
- Contrast: 0%
- Edge Darkness: 0%
- Black: 0%
- White: 100%
As for the screentone size, you can set it to anything other than Off. I chose L16 since it's the highest-resolution option and it works well since my canvas was already pretty high-quality to begin with.


Now apply your changes and close out of the Effects menu.
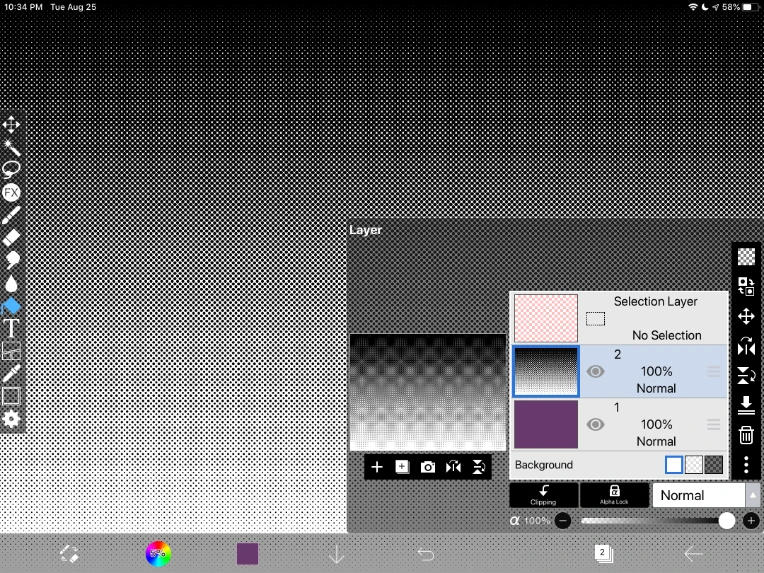
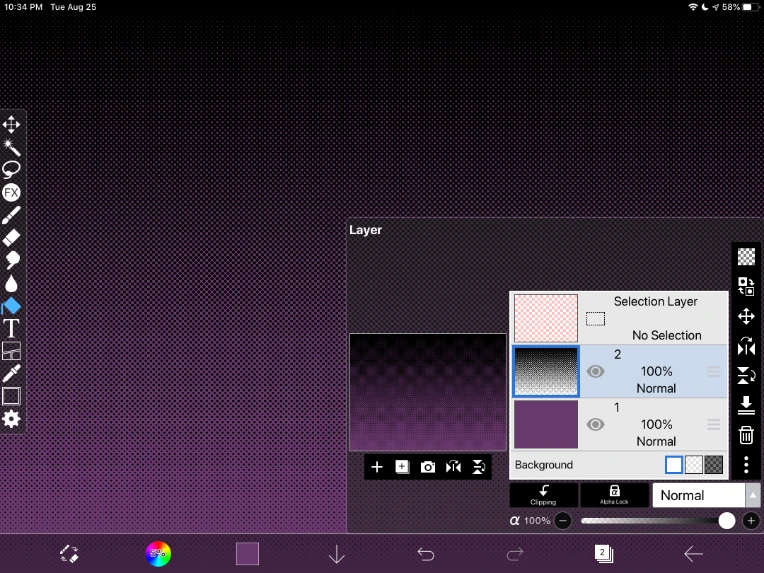
As of right now, our top layer has a manga gradient going from solid black to solid white, and our bottom layer has... nothing.
At this point, we can fix that. Just hide the top layer, select the bottom layer, choose the bucket tool, and fill in the bottom layer with any color of your choice. In my example, I chose a decently dark purple.

Now we have our bottom layer filled, but our top layer still isn't doing just what we want! It's still just a black and white manga gradient.

White, you say??
This next step is VERY crucial to make this technique REALLY shine. Unfortunately, I forgot to screenshot the button you tap to make the magic happen, so I'll try to explain this as best as I can.
Make sure you're on the Layer menu. With your top layer selected, tap the icon with the three dots and choose Clear White (Grayscale). The Color version pretty much does the same thing as the Grayscale version, but I selected Grayscale since, after all, I am clearing the white parts of a grayscale image.
And voilà! We have just cleared the white parts of our manga gradient, and now only the black remains. What's even better is that the gray pixels in between (an effect of anti-aliasing) are now transparent black pixels, which means we won't get any annoying gray anti-aliasing artifacts in our final product.

At this point, we're pretty much done. BUT, I do wanna show you the trick that allows you to EDIT the colors of this gradient after it's finished.
This will only work if your two layers aren't merged.
So, there are a number of ways we could go about solving this. One way to change the color of something is to use the bucket tool. This works fine for the bottom layer, but not the top, since we pretty much lose detail any way we go about this. Attempting to fill each and every tiny dot and speck will take FOREVER and do some weird things with the sizing of the dots.
So, what if we try to select all our dots somehow and then fill everything? This could work in theory, but selecting things in ibisPaint normally also does some weird stuff with the sizing and other qualities of the subject.
Sounds impossible after a while, right?
Well, not quite.
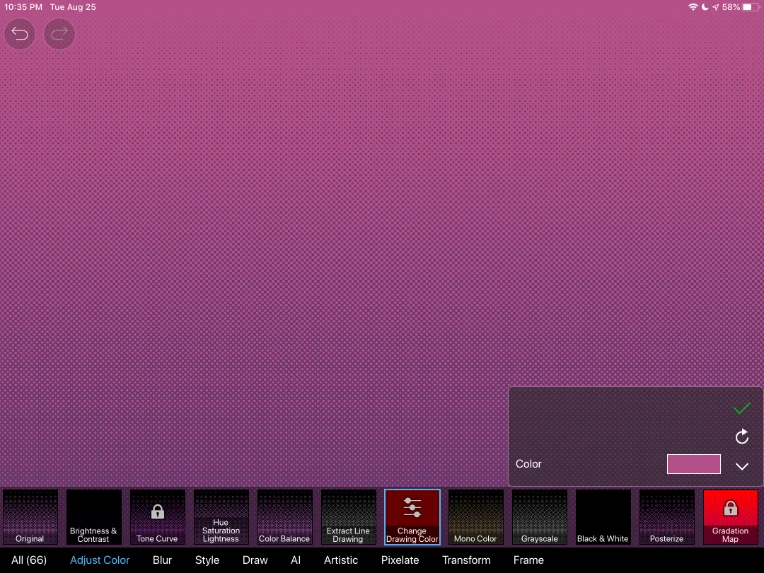
The best way to change the color of everything on a layer, which will work just fine and dandy for our purposes, is to go to the Effects menu and choose Adjust Color > Change Drawing Color.

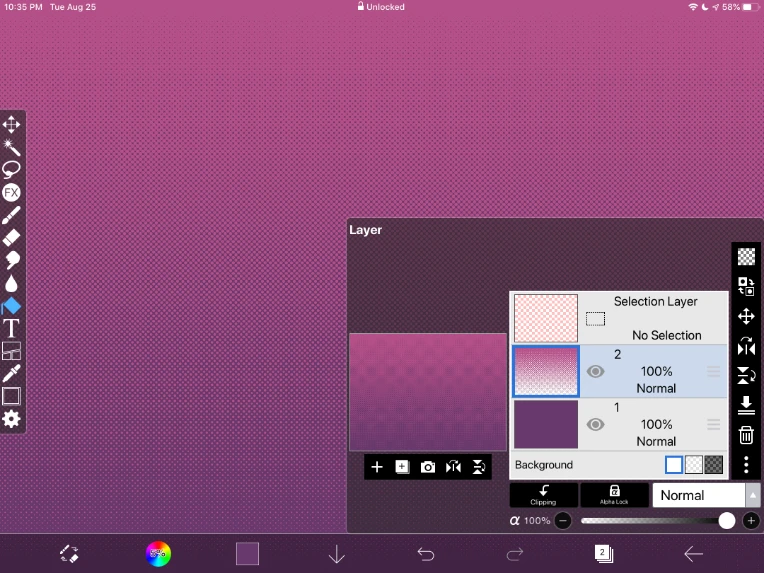
Just select the color you want to tint your top layer to and apply your changes (I chose a lighter magenta). It's super easy, it's super accurate, and there are no weird anomalies with ANYTHING. It just works.

And that is how you do it! If you do decide to change other aspects of the gradient, like the angle of it, without having any weird pixelation effects and all that, then sorry, you're gonna have to remake the gradient. :(
Otherwise, I think this technique is VERY useful even if you decide to change the colors of the gradient afterward or not. This can also apply to normal gradients that don't have a manga filter applied to it; just skip the Manga Background step.
In any case, I hope this tutorial helped. If you want more tutorials like this (really with any program you choose), then feel free to DM me on Discord with your request!
Thanks for reading, and have a nice day. :D

